


第8步启动程序
1. 如果你没有processing IDE,需要先下载,地址是:processing.org.
2.你还需要下载 oscP5 library,地址是:http://www.sojamo.de/libraries/oscP5/#installation
解压文件,将oscP5文件夹移动到目录 {C:\Users\[your user name]\Documents\Processing\libraries\}
3. 打开附件的代码运行。
Processing IDE运行方式和 Arduino IDE一样:File->open
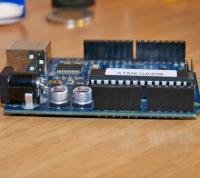
4. 在Arduino IDE上为Arduino板选择COM接口,记住你的数字
Tools-> serial port-> COM?
5
//----------------------Arduino code-------------------------


int message = 0;     //  This will hold one byte of the serial message
int forwardPin = 12;
int forward = 0;
int leftPin = 9;
int left = 0;
int rightPin = 8;
int right = 0;
int downPin = 11;
int down = 0;


void setup() {
  pinMode(rightPin, OUTPUT);
  Serial.begin(9600);  //set serial to 9600 baud rate
}

void loop(){
  if (Serial.available() > 0) { //  Check if there is a new message
      message = Serial.read();    //  Put the serial input into the message

   if (message == 'U'){  //  If a capitol R is received...
     forward = 255;       //  Set forward  to 255 (on)
   }
   if (message == 'u'){  //  If a lowercase r is received...
     forward = 0;         //  Set forward to 0 (off)
   }
   if (message == 'L'){//If capitol L is received..
     left = 255;//set left to 255
   }
   if (message == 'u'){// If lowercase l is recieved...
     left = 0;//set left to 0
   }
   if (message == 'R'){ // I think you get it
    right = 255;
   }
   if (message == 'u'){
     right = 0;
   }
   if (message == 'D'){
     down = 255;
   }
   if (message == 'u'){
     down = 0;
   }
}
analogWrite(forwardPin, forward); // Write an analog value between 0-255analogWrite(leftpin,left);
analogWrite(leftPin, left);
analogWrite(rightPin, right);
analogWrite(downPin, down);

}
import processing.serial.*;
import oscP5.*;
import netP5.*;
OscP5 oscP5;
int alphaValue;
Serial arduinoPort;
float v_push1 = 0.0f;
float v_push2 = 0.0f;
float v_push3 = 0.0f;
float v_push4 = 0.0f;
void setup() {
size(320,440);
frameRate(25);
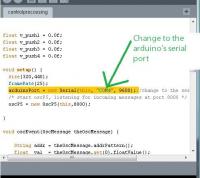
arduinoPort = new Serial(this, "COM4", 9600);//change to the serial port arduino is on
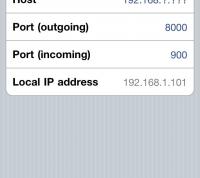
/* start oscP5, listening for incoming messages at port 8000 */
oscP5 = new OscP5(this,8000);
}
void oscEvent(OscMessage theOscMessage) {
String addr = theOscMessage.addrPattern();
float val = theOscMessage.get(0).floatValue();
if(addr.equals("/1/push1")) { v_push1 = val; }
else if(addr.equals("/1/push2")) { v_push2 = val; }
else if(addr.equals("/1/push3")) { v_push3 = val; }
else if(addr.equals("/1/push4")) { v_push4 = val; }
}
void draw() {
background(0);
// fader5 + push 1-4 outlines
fill(0);
stroke(0, 196, 168);
rect(17,21,287,55);
rect(17,369,60,50);
rect(92,369,60,50);
rect(168,369,60,50);
rect(244,369,60,50);
// fader5 + push 1-4 fills
fill(0, 196, 168);
if(v_push1 == 1.0f) rect(22,374,50,40);
if(v_push2 == 1.0f) rect(97,374,50,40);
if(v_push3 == 1.0f) rect(173,374,50,40);
if(v_push4 == 1.0f) rect(249,374,50,40);
if(v_push1 == 1.0f) arduinoPort.write("U");
if(v_push1 == 0.0f) arduinoPort.write("u");
if(v_push2 == 1.0f) arduinoPort.write("D");
if(v_push2 == 0.0f) arduinoPort.write("d");
if(v_push3 == 1.0f) arduinoPort.write("L");
if(v_push3 == 0.0f) arduinoPort.write("l");
if(v_push4 == 1.0f) arduinoPort.write("R");
if(v_push4 == 0.0f) arduinoPort.write("r");
2 条记录 1/1 页
猜你会喜欢

自制廉价的iPhone全息投影
这个初音未来的全息3D投影是针对iPho...

TEM36温度传感器
非常容易解释什么是模拟温度传感器,它就是...
基于MK802的摄像头自动光源跟踪
基于MK802的摄像头自动光源跟踪,展示...

用Android和Arduino控制门锁
这次我制作一个简易的无线控制门锁,实现用...
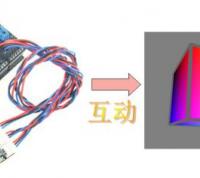
Arduino加速度传感器与幻彩立方的互动
这篇文章介绍MM7361三轴加速度传感器...
评 论
选择昵称后请轻按空格键
请勿进行人身攻击,谩骂以及任何违法国家相关法律法规的言论。